
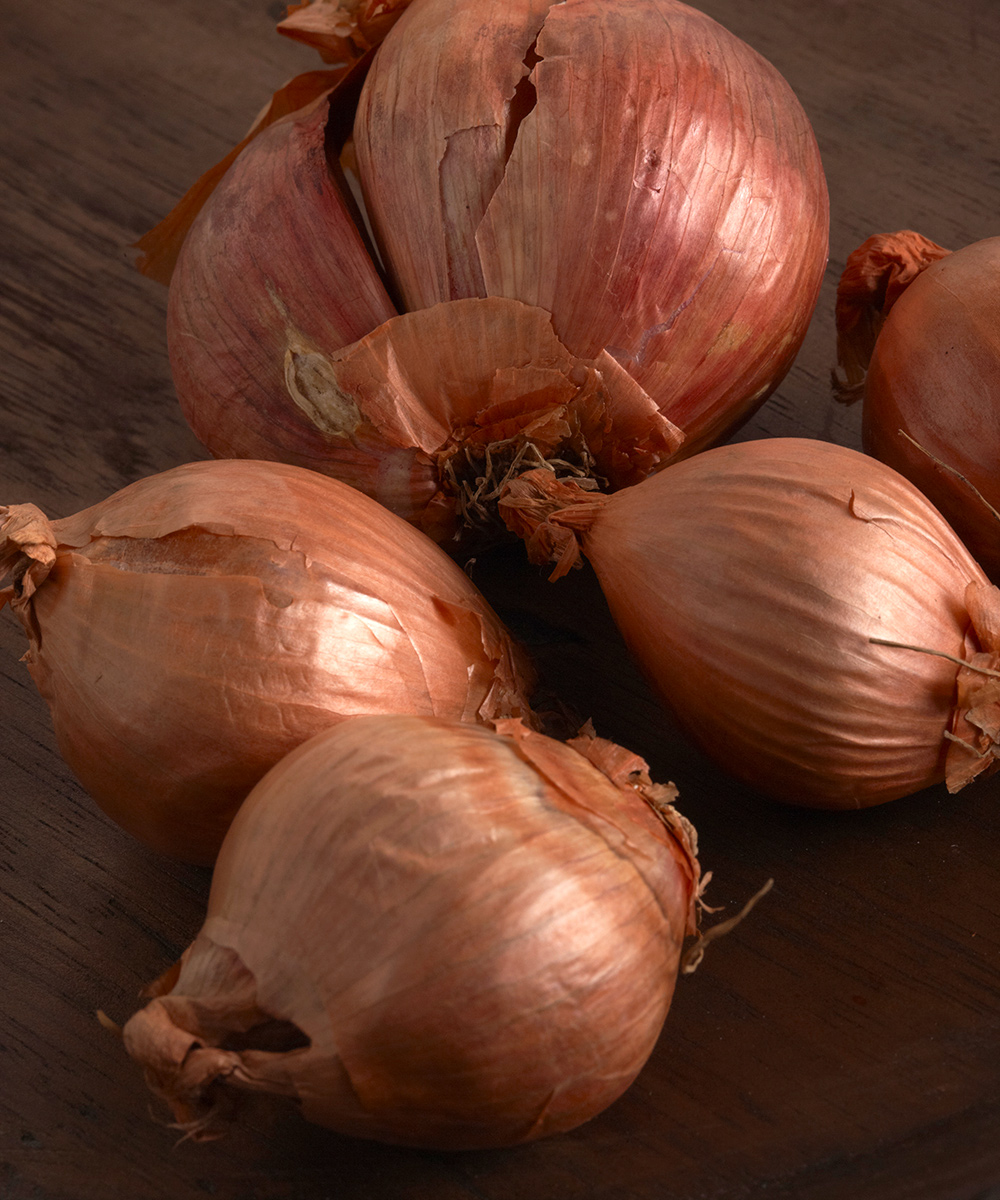
Shallots (Allium cepa var. aggregatum and cvs.) are expensive to purchase in the store, which is one reason I like to grow my own. A member of the allium or onion family, shallots have a subtle yet distinctive flavor and clumping growth habit. They are surprisingly easy to grow; however, gardeners may face some challenges in parts of the Southern Plains, which can be addressed with careful variety selection. Here’s how to grow these tasty bulbs for the best success in our region.

Plant shallots in October and November in the Southern Plains
With our mild winters, shallots are planted in fall for an early summer harvest. Plant shallots after the first frost of autumn, October in more northerly parts of the Southern Plains, and into November farther south. Select a planting site with full sun and well-drained soil. Loosen the soil with a garden fork, and mix in a little bonemeal to give the roots a boost. Alternately, you can apply a nitrogen-rich fertilizer after planting.
Shallots are planted as individual bulbs, much like garlic. Set the bulbs very shallow, with the tips just below the soil surface. Orient bulbs with the root scar facing downward and the pointy end up, 6 to 8 inches apart in rows. You can also tuck shallots among ornamental plantings outside the vegetable garden. Each bulb will grow into a plant that produces a cluster of five to 12 new bulbs, so allow room for the new bulbs to spread out around the original. Water the bed well after planting, and mulch your shallots in Zone 6 and cooler to protect them from extreme cold.

Choose shallot varieties that can stand up to our summer heat
Like other members of the onion family, shallots respond to day length to induce bulb formation. Almost all shallot varieties are considered “long day,” which means they require day lengths of 12 to 16 hours (depending on variety) to stimulate bulb development. This critical day length arrives in the heat of summer for much of the Southern Plains, which can cause problems.
‘French Red’ shallot is the most common variety sold commercially, and I have had great success with this variety in my Oklahoma garden. A shallot trial in Kansas also reported large, plentiful bulb production from ‘French Red’. ‘Sante’ was another successful variety in that trial.
Shallots also respond well to vernalization, or exposure to freezing temperatures, which produces larger, more flavorful bulbs. As such, growers in Zone 9 and warmer should consider growing multiplier or potato onions, such as yellow potato onions (Allium cepa and cvs.), instead of shallots. Another option is to grow a shallot onion, such as ‘Zebrune’, which is a hybrid between a shallot and an onion that has a sweet, mild flavor and is resistant to bolting.
Water and fertilize shallots regularly when warm weather returns
Did I mention how easy shallots are to grow? They don’t require much pampering during the winter months. Make sure to water them in well after planting, and keep plantings weeded as cool-season weeds pop up. Only water again if the soil dries, but take care not to overwater.
Watch for growth to resume when the weather warms in spring. This is your indicator that it is time to resume watering (if it doesn’t rain) and to fertilize your shallots. Two methods can be used for fertilizing shallots; use the one that fits your gardening style. The first option is to apply a single application of a slow-release nitrogen fertilizer such as blood meal to feed plants throughout the spring. Apply 1 to 2 teaspoons in a ring around each plant, taking care not to contact the stem. An alternate method is foliar-feeding plants with a liquid fertilizer, such as fish emulsion, every two weeks until bulb formation begins around mid-May.
Harvest shallots when bulbs are pushing out of the soil in late June
Bulb formation takes several weeks and is initiated by lengthening days. Because shallots are planted so close to the surface, you can often see the developing bulbs pushing out of the soil when they are ready to harvest. Other signs that plants are ready to harvest include flopping and yellowing of foliage, typically in late June. Sometimes the bulbs don’t bulk up until just before harvesttime, so have patience.
Bulbs can be pulled easily from loose soil by hand or lifted with a garden fork. Shallots are cured similarly to other types of edible allium bulbs. Cure the bulbs in a warm, dry place for about a week. After curing, store shallots in a mesh bag under cool, dark, and dry conditions. Keep the smallest bulbs to replant for next season’s harvest.
Use the leaves and scapes of bolted shallots for flavor
Like onions and garlic, shallots can bolt or flower, which interrupts bulb formation and diminishes the storage life of the shallot. Fortunately, shallots are slower to bolt than garlic, but it can still be a problem, particularly in hotter regions. Consider growing a bolt-resistant variety.
A bolting shallot does not need to go to waste. Harvest any plants that bolt, and use them like scallions or green onions. You can also cut the scapes (flowers), which you can also use like scallions, and leave the shallots in the ground until you are ready to use them. Developing shallots have a delicate flavor and can be harvested to eat even if they do not bolt. Pull shoots when they are the size of green bunching onions, and use them in salads or as a garnish.
Shallots are incredibly versatile in the kitchen. They are a favorite among chefs and are certainly worth a bit of experimentation in the garden.
—Kim Toscano is a horticulturalist based in Stillwater, Oklahoma. She previously hosted Oklahoma Gardening, a weekly PBS television program produced by the Oklahoma Cooperative Extension Service.






Comments
Log in or create an account to post a comment.
Sign up Log in