3 Salvaged and Repurposed Container-Garden Planter Ideas
Take these cost-saving measures to get the pots you want at a price you can afford
It’s no secret that potted annuals and tropicals and Vietnamese ceramics are usually kinder on the eyes than on the wallet. But if you don’t feel like splurging this year, don’t think your container designs have to suffer. Creativity trumps a big budget any day. By rethinking where you get your plants and pots, or using repurposed container garden planters, you can create some unexpectedly lovely designs for a fraction of the cost.
To start, never turn up your nose at plants you already have. As gardeners, many of us have hordes of plants right outside our back door. Dividing perennials from your garden, swapping divisions with neighbors, starting seeds, and propagating cuttings are all thrifty ways to get plants for containers. The savings don’t have to stop, however, once you’ve scored a bundle of low-priced plants. Planting in unconventional containers is another way to cut costs. Flea markets and salvage warehouses are teeming with things that you can convert into planters. You might even discover some great finds in your own garage. Better yet, repurposing objects often starts with the thrill of snagging them for a cheap price.
If you’re still not convinced that these homespun methods can produce the stylish look you’re after, check out the following designs. All four put these practices to the test and promise a lot more character than brand-new terra-cotta.
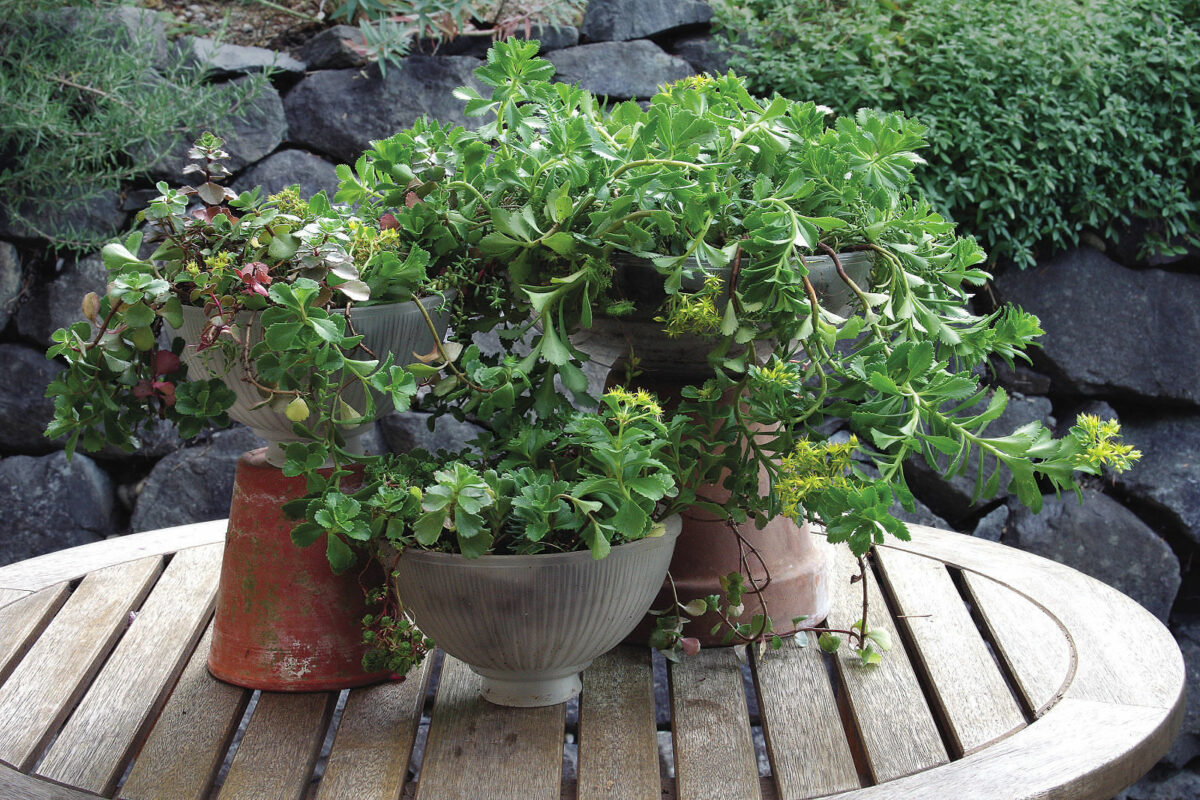
Reused glass lamp shades and sedum cuttings make a stunning centerpiece
Salvage stores often stock old glass shades in bulk, making them irresistibly inexpensive. I picked these up for just a dollar a piece. They can handle being potted up because they have thick sides and aren’t tippy when placed upside down.
Refashion and reuse
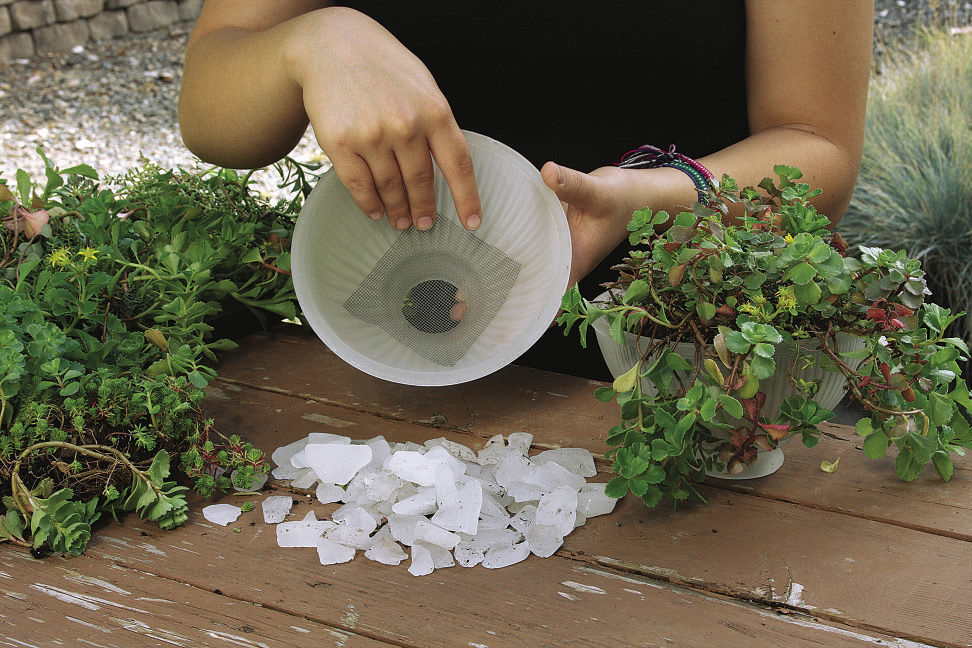
Converting these glass shades into pretty little planters was easy. I simply flipped the glass fixture upside down (bowl-like) and placed a square of mesh screen over the hole to prevent soil from spilling out of the bottom. The mesh screen should be at least 2 inches wider than the hole; otherwise, the screen might push through. I topped the screen with a few inches of tumbled beach glass and filled the remaining space with potting soil and plants.
Propagate to save pennies
The space inside any container should be roomy enough to accommodate the root systems of the plants you select. Annuals or perennials with shallow root systems suit these pots best. To propagate the sedum cuttings, I simply took 3- to 4-inch-long stems, removed the bottom leaves, and stuck the cuttings an inch or two deep into damp potting mix. Within a few weeks, the cuttings took root.
Salvaged containers and seedlings are a thrifty combo
Seeds are relatively inexpensive and often your best bet if you fancy unusual varieties; this is especially true for edibles. The downside to seeds, of course, is that they require planning and patience.
Sow fast sprouters
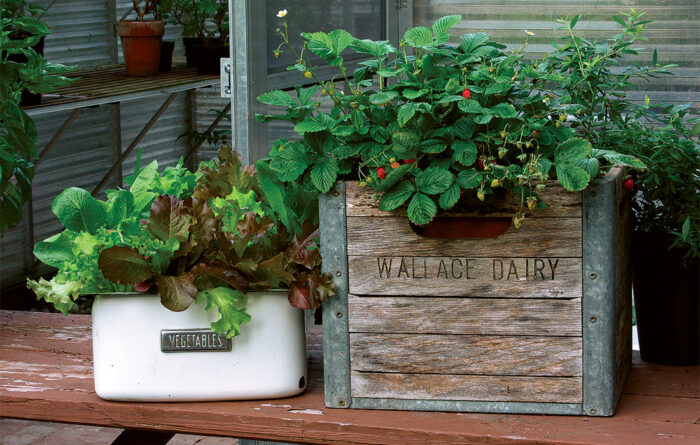
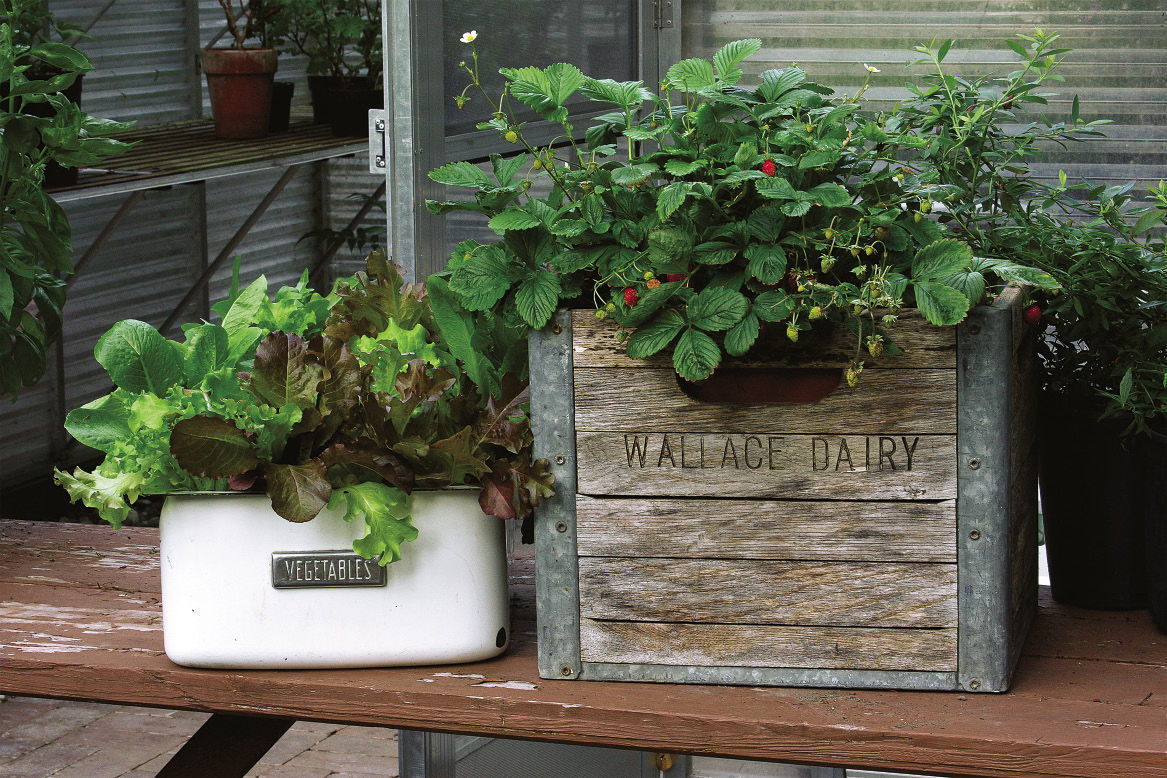
To speed up the seed-starting process, pick plants with a reputation for growing vigorously. The ‘Mignonette’ alpine strawberries (Fragaria vesca ‘Mignonette’, Zones 5–9) in the photo above grow quickly and produce an abundance of tiny sweet berries all season long.
Repurpose old things into container-garden planters
I planted the strawberry seedlings in an old dairy crate that I got for free at a local farm. To keep moisture and soil from deteriorating the wood, I placed a low, bowl-shaped plastic pot inside the crate. A walk through an architectural-salvage store scored the metal refrigerator bin—a rare but great find. The original metal label pleads for edible plantings, such as these colorful leaf lettuces.
A kitchen castoff and plant divisions create a focal point
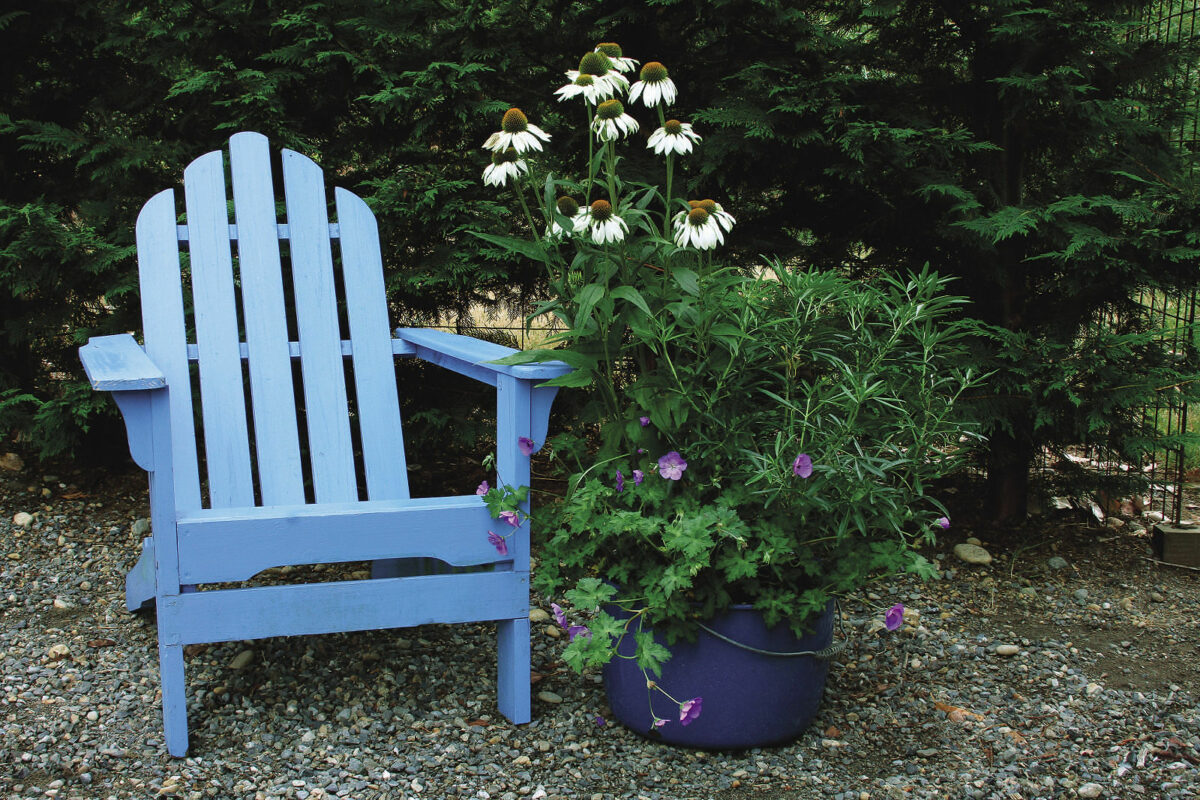
After this blue spatterware enamel pot became too chipped for cooking, I filled it with plant divisions and set it out in the garden.
Pull perennials from beds
This mix of ‘Fragrant Angel’ coneflower (Echinacea purpurea ‘Fragrant Angel’, Zones 3–9), Rozanne geranium (Geranium ‘Gerwat’, Zones 5–8), and ‘Aztec Pearl’ Mexican mock orange (Choisya ‘Aztec Pearl’, Zones 8–10) offers months of texture and color. When dividing perennials for containers, remember that the larger the division, the less transplant shock it will suffer. Before putting your newly planted container on display, allow the divisions to recover: Keep them sheltered from hot sun and well watered for a few weeks.
Pick planters built to last
Metal wears the longest of any container material and resists breakage and freeze-induced cracking. The downside of this toughness is that metal gathers heat; when placed in the sun, a metal container can burn a plant’s roots. In winter, these pots offer no insulation from freezing. Consider insulating metal containers with a secondary plastic pot or a layer of plastic bubble wrap. Most salvaged metal pieces come without a drainage hole, but you can make your own using a punch tool or a drill bit designed for metal. If the outside of the pot is unattractive, a good scrubbing and a fresh coat of paint can work wonders. Good-quality spray paints labeled “for use on metal” can be sprayed right over rust and stains.
Plants you only have to buy once
These perennials and annuals grow happily in containers and readily multiply.
Divisions that rebound quickly |
Softwood cuttings that root easily |
Self-sowers that sprout quickly |
|
|
|
More tips to make your container season a success
Splurge on the planter, save on the plants
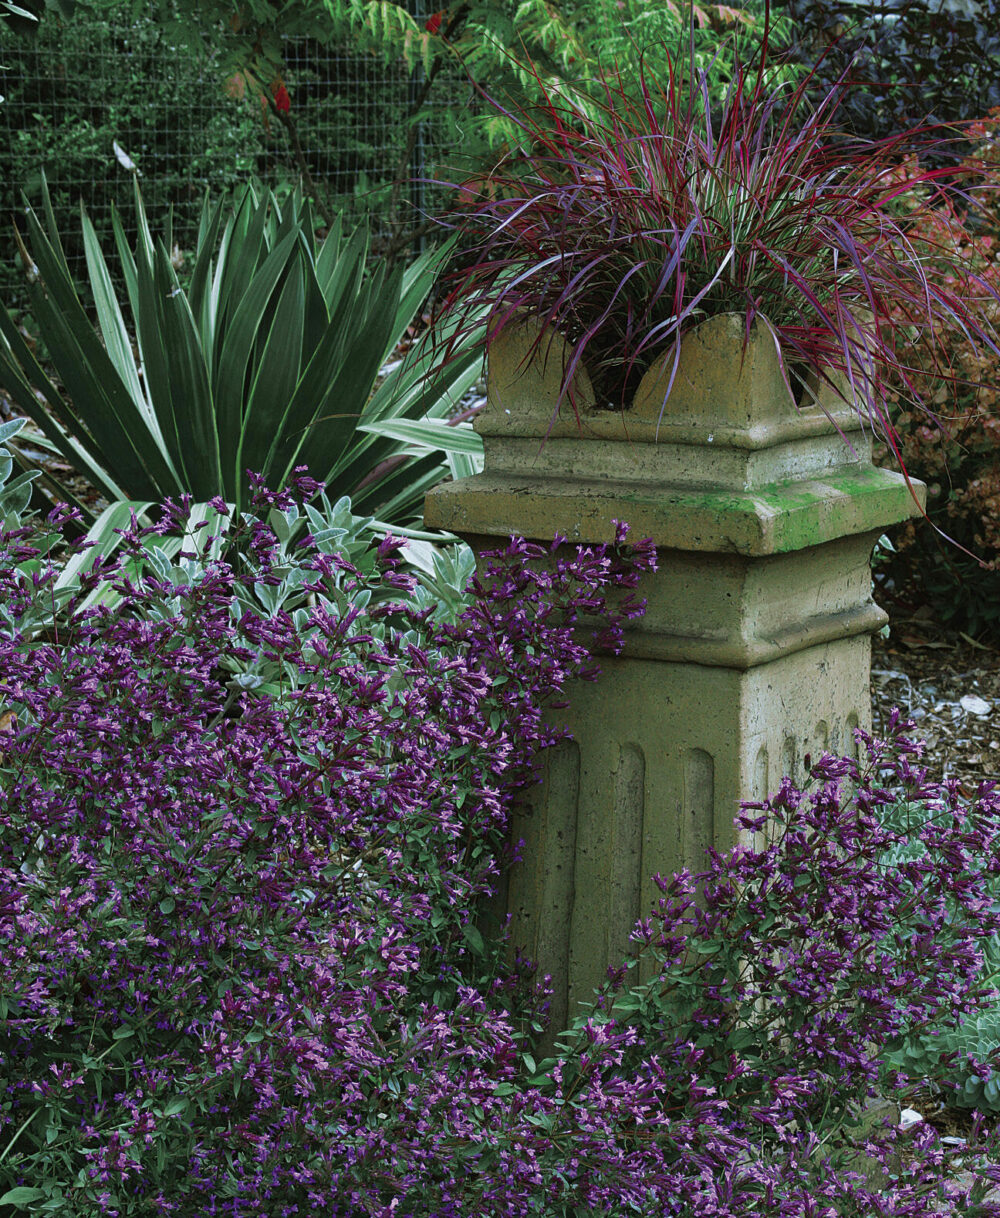
When a container is especially decorative, like this chimney pot, you can save money by keeping the planting simple.
One good plant is all you need
In this design, a lone ‘Fireworks’ fountain grass (Pennisetum setaceum ‘Fireworks’, USDA Hardiness Zones 9–11) softens the top edges of a reclaimed chimney pot, adding a simple elegance that doesn’t distract from the container’s beauty.
Stylish isn’t always expensive
You can purchase chimney pots new, but some of the least expensive and best finds (ones with cool distressed textures) are at antique stores and architectural-salvage companies. The price for a pot can range from $50 to $300, depending on the pot’s condition. I snagged this one for about $50 at an antiques shop. Although its price wasn’t exactly low, a well-made terra-cotta or stone pot can last for many years, saving money in the long run.
If you bought it, you should care for it
A $50 container used for 10 years winds up only costing $5 per year. So you had better maintain it to get your money’s worth. Here are two tips for dealing with containers made of porous materials: First, disinfect the inside of the pot with white vinegar or a weak bleach solution, because porous surfaces sometimes harbor diseases that can harm your plants. Scrub carefully, and rinse well; ceramic and stone surfaces break down easily from hard brush bristles and acidic products. Second, keep the containers indoors during winter to protect them from freeze-and-thaw cycles.
—Sue Goetz is the owner of the Creative Gardener, a design firm in Gig Harbor, Washington.
Photos: Ann E. Stratton



Comments
Log in or create an account to post a comment.
Sign up Log in